Tuesday, December 2, 2008

Indian Spinach Summer cultivation

Summer cultivation of Indian spinach (Basella alba) is a lot more easier when compared to Monsoon season. However it is very labour intensive, right from making trenches to plant vines to the time of harvesting to irrigation, adding manure and all other inter culture operations.

We grow Spinach on the ground and not on a trellis during summer season. following are the methods we employ in cultivation of Indian spinach Basella alba (basale soppu, valchi bajji)

selection of land
  • land selected must have good irrigation facilities
  • Should get plenty of direct sunlight and no shade
  • Loamy soils preferred with good drainage
  • soils which were previously used for growing vegetables also can be used
Cultivation method
  • long trenches around 5 feet wide & up to 3 feet in depth are made and the soil is ploughed manually well to remove weeds, break clods & remove stones and other inert materials
  • in each trench, approximately 20 to 30 baskets of freshly decomposed farm yard manure is added
  • the soil is then thoroughly mixed till a fine tilth is obtained.
  • in the trench at every distance of 2 feet, a pair of cut vines of spinach are planted
  • planting of the cut vines can be done on both sides of the trench. This is a beneficial method of planting as all the nutrients can be utilized & there is no wastage of water & nutrients.
  • immediately after planting, light irrigation is provided such that it does not disturb the transplanted vines
  • since the temperatures peak in summer, at transplanting stage, shade must be provided to the young vines. Here we have used palm leaves of coconut.
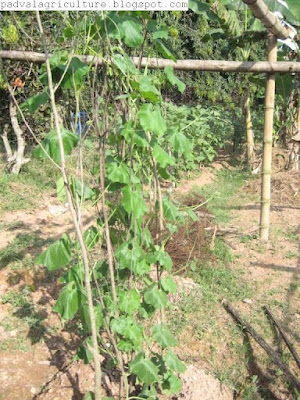
  • the developing vines also must not come in contact with soil in early stages of its growth & hence, the same coconut palms which were used as shade can be used as a 'carpet' on which the vines grow
  • harvest can be done in 30 to 45 days after transplanting
providing shade to transplanted cut vines of spinach

2 weeks after transplanting, the shade palms used as carpet for vines to grow on

Irrigation , Inter culture operations
  • water plays an important role in the development of healthy vines. water should be provided on daily basis till the vines branch out & more shoots are formed
  • after 4 weeks of transplanting, irrigation can be reduced to thrice weekly
  • plant residues, greens, leaves, etc must be incorporated into the soil to act as mulch, thereby reducing soil temperature & evaporation
  • manure has to be added whenever depletion is visible to the naked eye. the trench made must be of good size as to incorporate addition of large quantities of manure.
  • manure must be added at intervals of 20 to 25 days
Pruning & harvesting
  • 3 to 4 weeks after transplanting, the vines which have grown long & thin will have to be trimmed at the base of the stem to facilitate the growth of new shoots
  • at this stage, soil must be provided another dose of manure
  • at all stages of growth, the weakest vines must be discarded and replaced with new vines
  • regular trimming of the vines is advantageous as it allows more lateral shoots to emerge
  • 8 weeks after transplanting lush growth can be observed
after 25 days the vines grow long and slender which have to be trimmed at the base level to allow more shoots and manure also provided

10 days after trimming

20 days after trimming

45 days after transplanting lush growth, ready for harvest

Note: this method we adopt ensures that that the harvested spinach is fresh & tender as only the young developing vines are repeatedly harvested. Unlike the traditional method, where old and aged spinach wreaths are sold, we sell the spinach as bundles (see below)


Photos and content by Pritham 'Heavy metal farmer' denzil dsouza

Monday, December 1, 2008

Indian Spinach (basale soppu, valchi bhajji)


Indian Spinach (Basella alba) also popularly called malabar Spinach, is a distant relative of the Spinach family. It grows as a vine and can attain length of up to 10 meters. it is a fantastic source of iron, vitamin A, vitamin C & calcium. other names are In Kannada Basale soppu, in Konkani Valchi bajji, In bengali pui shak.

The main characteristic feature is the presence of thick mucilage in the leaves & stem, which apart from high nutritive value, also is used in variety of dishes to get thicker gravy, or in soups.

MONSOON TECHNIQUE

Following are the methods used in the cultivation of Indian Spinach Basella Alba under monsoon conditions.

1. Selection of vines
this is the most important criteria for getting a long and steady harvest. The vines can be obtained in the local market , which are sold as wreath bundle. only the best and healthy vines should be used to transplant in the main field while the diseased, old, weak ones are left out. then they are thoroughly washed & kept in a moist place, or water is sprayed on them everyday till the day it is planted.


2. Cutting the vines
Here the selected vines are cut to a length of up to 2 feet, and all the lower leaves removed, keeping only the leaves at the tip/apex of the vine. This is done for polarity to identify which part of the vine is planted in soil & which part is to be trained over a supporting structure.


3. Providing support
since this is a monsoon technique, support must be provided to the growing vines as they should not come in contact with the wet soil, as the growing tips will be succeptable to rot and other fungal diseases.
Making the trellis
  • the land selected to make the trellis to train the vines must have little slope to prevent water from stagnation.
  • rows are dug with width of about 2 feet & pits are made in these rows to a depth of about 2 feet
  • at every 2 meter distance bamboo poles must be placed along the length of the row
  • a concave cut must be made on top of each bamboo pole so that it can support the weight of additional poles and sticks which will be placed on it (see fig 1)

fig 1

fig 2

  • the poles are then tied with the help of GI wire, or rope (see fig 2)
  • between the 2 poles , sticks of certain thickness are placed diagonally as shown and tied with wire or rope.
  • the already cut vines are then planted on the south side of the poles & it is tied with thin rope to make it erect (see fig 3)
  • the growing vines will climb over the trellis , not coming in direct contact with the soil
  • vines will be ready for harvest after a period of over 2 months.
fig 3 erect vines tied with thin rope

fig 4 one view of trellis

fig 5 after 21 days,

fig 6 after 30 days, weak vines must be pruned to allow more shoot development

irrigation
since this is a monsoon technique of growing spinach, no irrigation is needed, however care must be taken to note that at this critical stage of its growth, there must be no water stagnation at the base of the vine. this will result in rotting of the stem & death of the entire vine

Fertilizer application & inter culture
  • at the time of planting the cut vines in the soil, the land must contain good amounts of decomposed farm yard manure and compost.
  • application of certain strains of bacteria also help in quick root formation and absorption of soil nutrients
  • each vine must have a minimum of 2 to 3 buckets of manure. & application is repeated at an interval of 21 days.
  • care must be followed to see that the growing stem does not come in direct contact with the manure. so the manure must be added at a little distance. This is when the vine is just transplanted. since its tender , it might not be able to handle the manure load.
  • At every interval of manure application, weeding must be done & soil is loosened at allow good aeration or it will result is hardening of the soil.


fig 7 75 days after transplanting

fig 8

Harvesting

since temperature and light are 2 main limiting factors, the growth of the vines is slow & harvesting can be done on commercial scale only after gap of more than 50 days. but regular pruning of long , weak vines is done at weekly intervals to facilitate growth of new shoots.

when the monsoons subside harvesting can be done after 90 days from date of transplanting.

fig 9 90 days after transplanting

Photos and content by Pritham 'Heavy metal farmer' denzil dsouza

Thursday, November 27, 2008

Pests of Snake gourd


Fruit borer


  • the most serious pest damaging the young fruits is Daucus cucurbitae which is mentioned under cultivation of Ridge gourd.
  • the image above shows yellow/brown discoloration on the fruit as a result of boring the tender fruits. since the attack is major on standing crops, chemical pesticides should not be used as it will leave behind toxic residue.
  • using pheromone traps is the best & economical method to control the pest click here
  • spraying with neem based repellents can also be done
  • the infected young fruits must be completely destroyed as they contain young larvae which will emerge and pupate in the soil, thereby continuing the cycle.
  • soil drenching. treatment with chloropyriphos @ 2 ml per litre water can be done
LEAF EATING CATERPILLAR


  • Leaf eating caterpillar ( Diaphania indica) is the most serious pest where damage to the plant is highest.
  • the caterpillars can be seen on the lower surface of the leaves & feed on the young developing leaves, thereby curtailing the growth of the vine.
  • pupae in silken cocoons can be seen & these caterpillars when come in contact with human skin can also cause severe rash & allergies.
  • the plant appears to be wilting & severely drooping leaves is the sign of this pest.
  • if the area under cultivation is small, hand picking the pest using protective gloves is best. however if the area is large, then it becomes very time consuming. spraying with chloropyriphos @ 2 ml per litre and Quinalphos @ 1 ml per litre is very effective. But great care must be taken while spraying these chemicals as they are high in mammilian toxicity.
  • spraying must be done on the lower surface of the leaves & younger , tender leaves must be sprayed first.
  • in some cases, natural predators like birds feed on the caterpillars. so spraying must be done only when situation demands.
Photos and content by Pritham 'Heavy metal farmer' denzil dsouza

Snake Gourd


Snake Gourd ( Trichosanthes cucumerina) is native to India & grown for its long and slender fruits. It is a climbing vine & some varieties also produce short fruits.


Climate & soil
  • It requires tropical , warm & humid climate for best growth
  • it cannot tolerate heavy rainfall as flowering is greatly affected.
  • very heavy rianfall will make the plant succeptable to various fungal & mycoplasma diseases
  • loamy soils are preferred for its cultivation
  • soil pH must be in range of 6.0 to 7.0
  • every cold climate is not suitable, & it cannot tolerate frost
Sowing
since we are following summer methods of cultivation, we made use of the previously made seed beds which belonged to the previous crop & previous season

  • pits measuring 2 feet in diameter are made & 2 seeds sowed per each pit
  • the pits must be well mixed with farm yard manure till a fine tilth is obtained.
  • lite irrigation is then given
  • since the seeds take a long time to germinate due to very hard seed coat, it is advised to soak the seeds in water over night before sowing
  • some practices follow the soaking of the seeds in curds to activate quicker germination
  • when conditions are good, the seeds germinate within 10 days. if the seeds have still not germinated, re sowing is recommended
germination seen within 10 days after sowing

one week after germination

12 days after germination

Irrigation & Inter Culture Operations
  • light irrigation must be given immediately after sowing
  • it is important to maintain the moisture level in the soil. after germination, dried leaves, etc can be used as mulch to retain moisture
  • during growth stage, watering must be done at least thrice a week, when temperature is high. during later stages of growth, water intake can be reduced
  • since the plant is a vine, support must be provided so that it grows & it must be trained over a bower or pandal or trellis.
  • 21 days after sowing, well composted farm yard manure has to be added. care must be taken to see that the manure is well composted or it may damage the shoot.
  • at this stage, while adding manure, the size of the pits must be increased by working on the sides of the pit to accommodate manure & also to provide more area for the movement of the roots. clods that are formed are destroyed , resulting is good soil aeration & porosity
  • all the weeds must be removed
when plant reaches 21 days time, manure is added & support is given for the vines to climb

photo below shows rapid climbing of the vines after 35 days of sowing

Flowering & Harvest
  • fruits start forming after 60 to 70 days after sowing.
  • at flowering stage , one spray of plant hormones like NAA is recommended @ 1 ml in 1 litre water to increase the number of female flowers.
  • fully developed tender fruits can be harvested every 4 to 5 days.
  • tying a small stone to the stigmatic end of the fruits is a widely practiced method.
  • under organic practices, the plant will continue to yield for up to 2 months, when conditions are favourable.
  • the average yield of snake gourd is over 150 quintals per hectare.
some varieties in our farm


the green fruit with longitudinal white stripes. these fruits are much more heavier than the white fruits & are medium to short in length

these white fruits yield continuously, and are less heavy compared to the green type. the fruits are soft & short.

Photos and content by Pritham 'Heavy metal farmer' denzil dsouza

Thursday, September 18, 2008

Bottle Gourd cultivation

Bottle gourd (Lagenaria siceraria) is a widely grown tropical vegetable which has high carbohydrate content. oil can be extracted from the seed kernel and is used in hair care products. the hard shells of the bottle gourd can be used as utensils, or floats in fishing nets and even musical instruments, due to its resonating property.

soil and climate
bottle gourds require well drained and sandy loam soils for its good cultivation. it cannot tolerate higher amounts of acidity, alkalinity or salinity. pH range is between 5 to 5.5 . when soil conditions are not optimum, then production of female flowers is greately affected.
ten days after sowing. thinning out has to be done & min of 2 seeds must be retained in every bed

21 days after sowing.

it can be grown almost in all climates, however, too much rainfall is not good. optimum temperature range is between 30 to 35 degrees during day. if temperature is very high, then more number of male flowers are formed thereby decreasing yield.

LAND PREPARATION, IRRIGATION AND FERTILIZER MANAGEMENT

Since we are discussing monsoon techniques for growing bottle gourds, the land selected must have good drainage. to attain this at least 3 repeated ploughings must be done. raised seed beds are made up to height of 30 cm & distance between beds must be maintained at minimum 2 meters.
irregular leaf shape is due to heavy rainfall & pest attack. spraying with systemic insecticides like dimethoate @ 1 ml per litre every week till plant is healthy is done.
lush green leaves indicates good nitrogen in the soil

in the presence of optimum sunlight, the leaves are able to prepare their own food & the plants appear much more healthy

irrigation is not given during monsoon , but when there is dry spell, light irrigation must be done just to replenish soil moisture. in summer irrigation is carried out thrice a week. if proper mulching is done, irrigation can be reduced to twice weekly.

the 3 photos above show the crop development after a 35 days after sowing. care must be taken to see that the growing vines are free from developing weeds, or it will hinder harvesting.

development of fruits, fruit setting seen


requires good amounts of organic manure. since it is a long duration crop, it is highly beneficial to add manures in split doses. bulky organic manures can be added to the soil every 20 days, while it is good to add complex fertilizers at least once every month.
it responds great to foliar applications as well. the number of female flowers can be increased using plant hormones like NAA, naphthalene acetic acid @ 1 ml per litre, just during flowering stage.
a healthy bottle gourd plant, which seems to be climbing. the vines can grow up to 20 feet, if left unchecked & hence thinning out is done to avoid overcrowding. also distance is maintained between beds for this reason

flowering can be observed. the plant continues to grow & the vines cover the complete area giving a carpet like appearance.

fruit setting in the above 2 photos

the green carpet cover

HARVESTING
bottle gourds can be harvested after 55 to 75 days after sowing. care must be taken while harvesting to see that proper tender and ripe fruits must be harvested. the developing tender fruits will have green color & the seed coat & rind are tender. it is best to harvest at this stage. sometimes , harvesting is done depending on the size it attains. smaller fruits are in great demand as compared to bug sized fruits.
when the color changes from green to white, the seed coat and rind hardens & then it becomes over ripe & unfit for consumption. such fruits are kept for formation of seeds, which can be extracted once the fruit completely dries up.


some varieties can yield up to 20 tonnes per hectare.

NOTE
In many cases, especially during monsoon, the growing vines are pruned to allow more lateral branching. vines which are bit old & semi hard are pruned to get the desired result. in some other cases, the vines are allowed to train on coconut ropes grown on bower of bamboo sticks. this is done to prevent the developing fruits from coming in contact with soil & rotting.

Photos and content by Pritham 'Heavy metal farmer' denzil dsouza